
Installing Node.js takes two minutes. Making sure it actually works takes one more, and most people skip that minute. Then a tutorial says "run npm install", the terminal says "not recognized", and you don't know if the install failed or the terminal just doesn't know about it yet. Do the check. It saves the confusion.
Skip ahead: If node -v and npm -v already print versions in a new terminal, skip to "Check it from a project folder".
Step 1: Check if you already have it
Open a terminal and run:
node -v
npm -v
- Two version numbers: Node is installed. Check that the first number is a current LTS version (an even number like 22 or 24). If it's very old, like
v14, update it. - "not recognized" (Windows) or "command not found" (macOS, Linux): not installed, or not on your PATH. Continue.
⚠ Warning: If this is a work computer, ask before installing. Some companies manage Node versions centrally, and some projects need a specific version written in their README or in a .nvmrc file. Installing a different version on top can break other people's setup on a shared machine.
Step 2: Pick LTS
On nodejs.org, choose the LTS version, not Current. LTS (Long Term Support) gets security fixes for years. Current gets new features first and moves on quickly. Unless a project tells you otherwise, LTS. At the time of writing, that's Node 24.
Step 3: Install (Windows)
Download the Windows Installer (.msi) for your system (x64 for most PCs) from nodejs.org. Before you run it, check that it's really from Node.js: right-click the file, Properties, Digital Signatures. The signer should be the OpenJS Foundation. If there's no Digital Signatures tab, or it names someone else, delete the file and download again from nodejs.org.
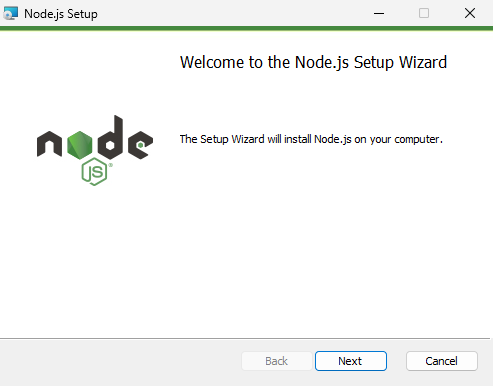
Click through with the defaults. Leave Add to PATH selected on the Custom Setup page. That's the part that lets you type node in any terminal. On the Tools for Native Modules page, you can leave "Automatically install the necessary tools" unticked. As the checkbox itself says, it also installs Chocolatey, and it adds the Python and Visual Studio build tools needed only by packages that compile native code. You don't need them to start, and it takes a while.
On macOS, use the .pkg installer from the same page. On Linux, use your distribution's instructions on nodejs.org rather than an old package from the default repositories.
💡 Tip: If you'll work on several projects that need different Node versions, use a version manager instead: nvm-windows or fnm on Windows, nvm or fnm on macOS and Linux. It lets you switch with one command. If you're just starting, the installer is fine. You can switch later.
Step 4: Open a NEW terminal and check
This is the step people miss. A terminal that was already open before the install doesn't know about the new PATH. Close it, open a new one, and run:
node -v
npm -v
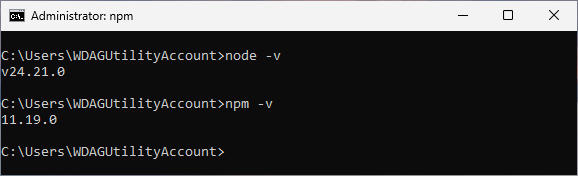
That's Node 24.21.0 with npm 11.19.0, captured in a clean Windows Sandbox. The title bar says "Administrator" only because the sandbox runs everything as an administrator. Your own terminal should not need that.
Then run one line of JavaScript, to prove Node actually executes code and not just prints a version:
node -e "console.log(1 + 1)"
2
Step 5: Check it from a project folder
Make a folder, then:
npm init -y
npm install dayjs
If you see added 1 package, npm can reach the registry and write to the folder. That covers the network, proxy and permission problems in one go.
If it doesn't work
Most likely causes first:
- "not recognized" right after installing: old terminal. Close every terminal (and your code editor, which has its own) and open a new one.
- Still "not recognized": PATH wasn't updated. On Windows, search for "Edit the system environment variables", Environment Variables, and check that
PathcontainsC:\Program Files\nodejs\. If it doesn't, run the installer again and choose Repair. npmworks in one terminal but not in PowerShell: an error about "running scripts is disabled on this system" is PowerShell's execution policy, not Node. Usenpm.cmd -v, or Command Prompt. Only change the execution policy if you understand what it protects, and on a work computer, ask IT first.- Wrong version shows: an older Node, or one from a version manager, comes first in PATH. Run
where node(Windows) orwhich -a node(macOS, Linux) to see every copy and which one wins. npm installhangs or fails with a network error: usually a company proxy or firewall. Ask IT for the proxy settings rather than turning off SSL checks.
⚠ Warning: Don't fix npm errors with sudo npm install on macOS or Linux, or by running everything as Administrator on Windows. It creates files your normal user can't change later, and you'll get permission errors on every install afterwards.
You're done when a new terminal shows both versions, node -e prints 2, and npm install adds a package. Which of those three checks did you skip last time you installed something?
About
Check if Node is already there, install the LTS, open a new terminal and confirm node, npm and an install all work, then fix the usual PATH problems. After this, you know Node works before a project tells you it doesn't.
Reviews
Sign in to write a reviewComments (0)
Sign in to commentNo comments yet.