

Changing the Page With the JavaScript DOM
Find elements with querySelector, change their text, classes and attributes, and add new ones. After this, your JavaScript can change what the visitor sees.
Skip ahead: If you already use querySelector and textContent and know why the result can be null, skip to "Adding new elements".
Everything so far happened in the console. Visitors don't look at the console. They look at the page. To change the page, JavaScript uses the DOM, the Document Object Model: the browser's live version of your HTML, as objects you can find and change.
The page as a tree
When the browser loads your HTML, it builds a tree. Every tag becomes a node, and tags inside other tags become its children.
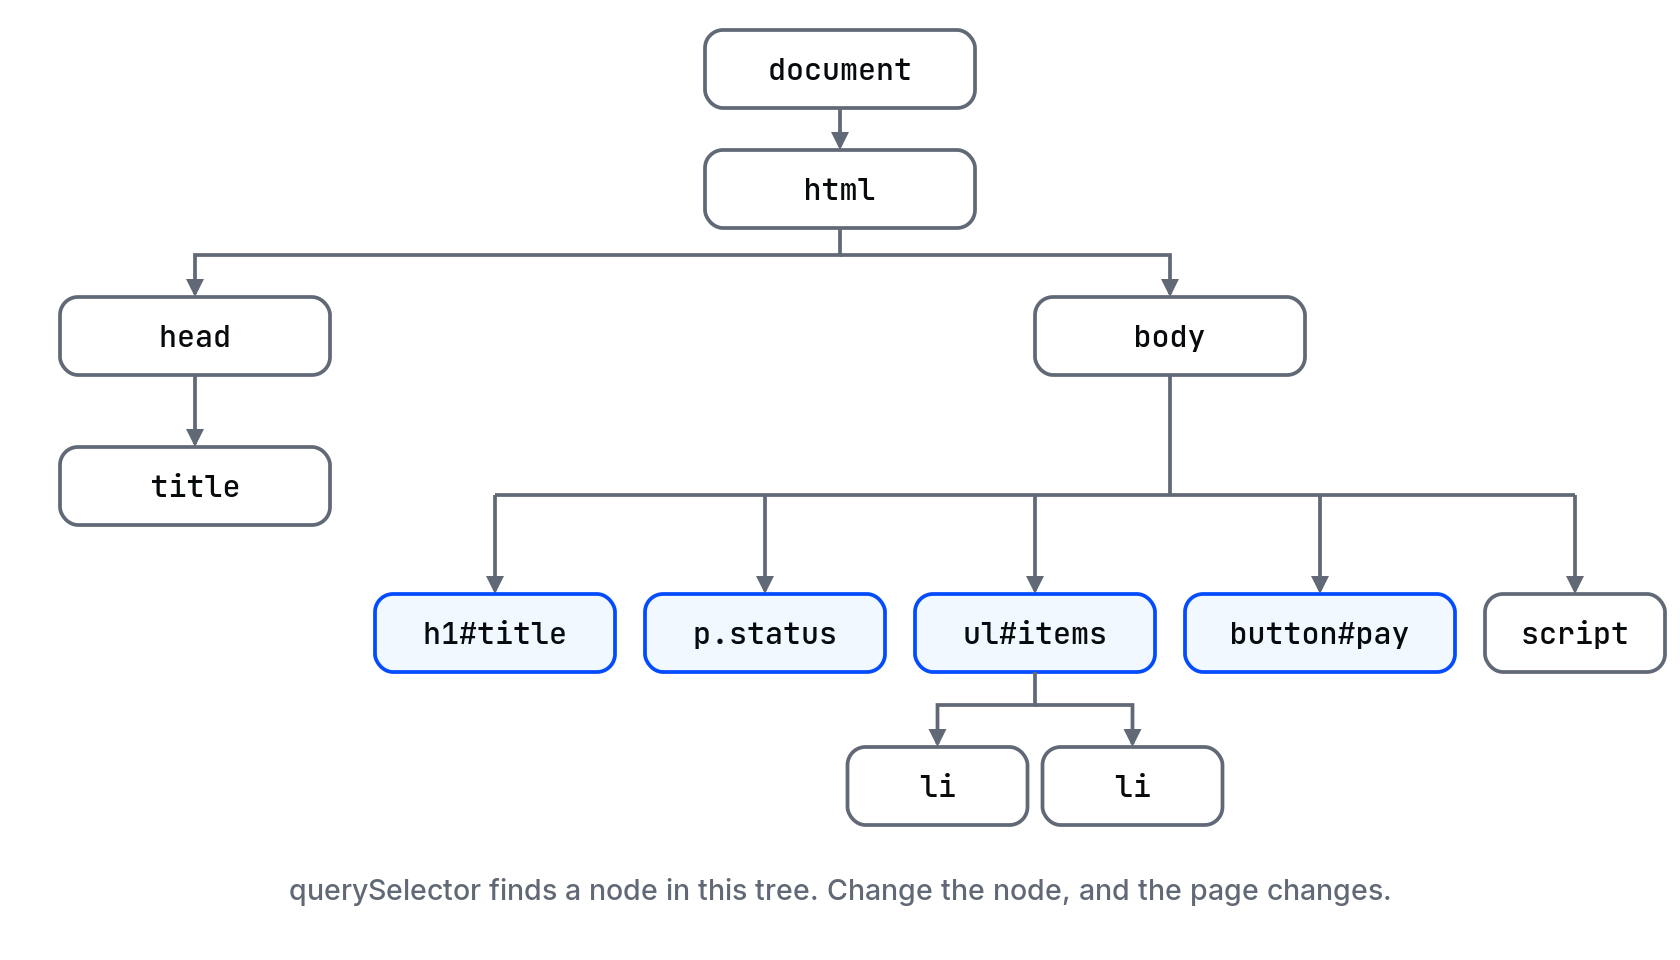
Here is the HTML for that tree. Save it as index.html with an empty script.js next to it, like in the console lesson.
<!DOCTYPE html>
<html lang="en">
<head>
  <meta charset="utf-8">
  <title>Order</title>
</head>
<body>
  <h1 id="title">Order summary</h1>
  <p class="status">Waiting for payment</p>
  <ul id="items">
    <li>Coffee x2</li>
    <li>Ensaymada x6</li>
  </ul>
  <button id="pay">Mark as paid</button>
  <script src="script.js"></script>
</body>
</html>
Step 1: Find the element
document.querySelector takes a CSS selector and returns the first element that matches.
const title = document.querySelector("#title");    // by id
const status = document.querySelector(".status");  // by class
const firstItem = document.querySelector("li");    // by tag
const allItems = document.querySelectorAll("li");  // every match

console.log(title, allItems.length);
# means id, . means class, a plain name means the tag. Same rules as CSS. querySelectorAll returns a list you can loop over with for...of.
⚠ Warning: If nothing matches, querySelector returns null, not an error. The error comes one line later, when you try to use it: Cannot read properties of null (reading 'textContent'). When you see that, the selector is wrong (a typo, # vs .), or the script ran before the element existed. Check those two before anything else.
Step 2: Change it
Put this in script.js and reload the page:
const title = document.querySelector("#title");
const status = document.querySelector(".status");

title.textContent = "Order #1042";
status.textContent = "Paid";
status.classList.add("paid");
status.style.color = "green";

document.querySelector("#pay").disabled = true;
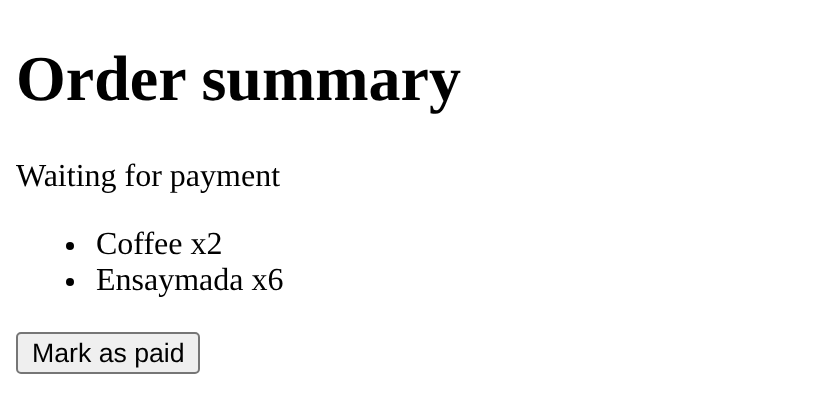
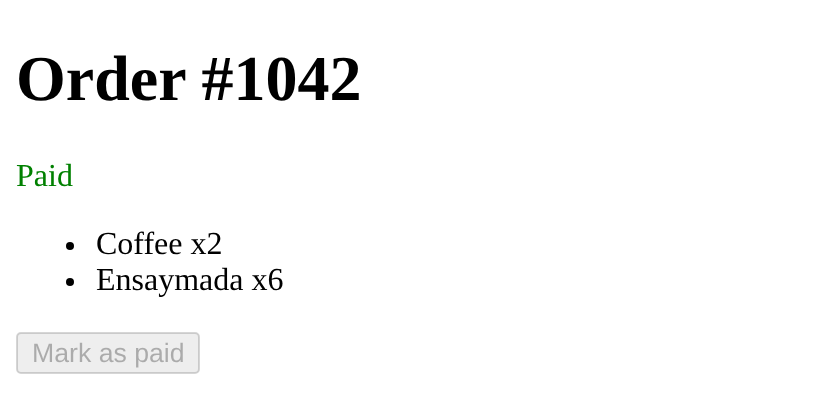
Before: script.js is empty. After: the same page with the script above.
textContentreads or sets the text inside an element.classList.add,.removeand.togglechange classes. Prefer this overstyle: put the look in your CSS and let JavaScript switch the class.- Attributes like
disabled,href,srcandvalueare properties you can set directly.
textContent vs innerHTML
innerHTML sets HTML, not just text. It's tempting because you can build a whole list in one string. It's also the classic way to open a security hole.
⚠ Warning: Never put text from a visitor (a form field, a URL, a comment) into innerHTML. If someone types <img src=x onerror="...">, the browser runs their code on your page, with your visitors' sessions. This is called cross-site scripting (XSS). Use textContent for anything a user typed. It shows the text as text, always.
Adding new elements
Create, fill, attach:
const list = document.querySelector("#items");
const li = document.createElement("li");
li.textContent = "Bottled water x1";
list.append(li);
The new item appears at the end of the list. remove() takes an element off the page: li.remove().
💡 Tip: Your changes are live in the DOM but not in your file. Reload the page and the original HTML comes back, then your script runs again. In DevTools, the Elements tab shows the current DOM, so you can check that your change actually happened.
Common mistakes
- Script tag in the
<head>withoutdefer, so the elements don't exist yet. Keep it at the end of<body>. - Wrong selector:
"title"(a tag) instead of"#title"(an id). - Using
querySelectorwhen you need all matches, then wondering why only the first one changed. - Changing
innerHTMLwith user input.
What happens if you skip this
You'll be able to calculate things in the console and have no way to show them to anyone. Or you'll learn innerHTML from a quick answer online and ship a page that runs strangers' code.
Look at the order page above. How would you show the number of items in the heading, so it says "Order summary (2 items)", without typing the number by hand?
About
Find elements with querySelector, change their text, classes and attributes, and add new ones. After this, your JavaScript can change what the visitor sees.
Comments (0)
Sign in to commentNo comments yet.