
Volumes: Keep Data When a Container Dies
Show that a container's files vanish with it, then keep data in a named volume and a bind mount. After this, you can choose where a container's data lives and not lose it by accident.
Skip ahead: If you already use named volumes and bind mounts, skip to "A folder from your computer", then go on to the next lesson.
A container's own files disappear when you remove the container. That is the right default for most things, and it is a trap for anything you want to keep: a database, uploaded files, a log. The fix is a volume, which is storage that lives outside the container and outlives it. This lesson shows the loss first, then the fix, and then the other kind of mount you will meet.
See the data disappear
Write a file inside a container, remove the container, and look for the file from a new one.
docker run --name notes-demo alpine:3.24 sh -c "echo remember-this > /note.txt"
docker rm notes-demo
docker run --rm alpine:3.24 cat /note.txt
notes-demo
cat: can't open '/note.txt': No such file or directory
The new container started from the same image, and the image never had that file. The old container's writable layer went away with it. Nothing is broken. This is how containers are meant to behave.
Keep it in a named volume
A named volume is storage that Docker manages for you. You give it a name, and any container can mount it at a path.
docker volume create notes-data
docker run --rm -v notes-data:/data alpine:3.24 sh -c "echo remember-this > /data/note.txt"
docker run --rm -v notes-data:/data alpine:3.24 cat /data/note.txt
notes-data
remember-this
-v notes-data:/data reads as "mount the volume called notes-data at /data inside the container". Both containers were removed with --rm, and the file is still there, because it was written to the volume and not to the container. The name is what connects them. Mistype it and Docker silently creates a new, empty volume with the wrong name. That is the mistake to check first when your data "disappears".
docker volume ls --filter name=notes-data
DRIVER    VOLUME NAME
local     notes-data
Named volumes live inside Docker's Linux environment, not in a Windows folder you can open. That is on purpose. Docker handles permissions and speed for you. You can still back one up or look at it with a throwaway container, as above.
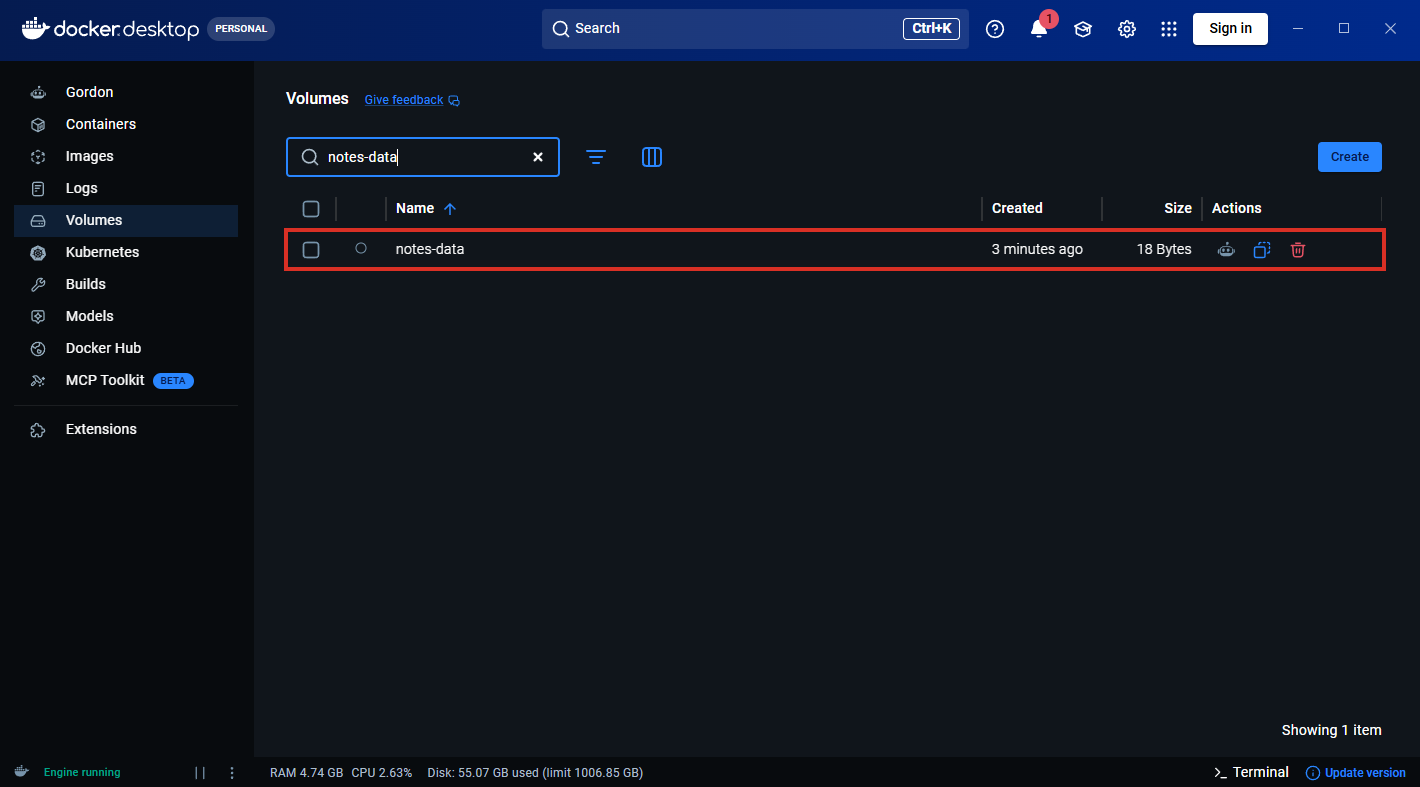
The Volumes tab in Docker Desktop lists the same volume. I filtered it to notes-data. The size is a few bytes, because the volume holds one short file.
💡 Tip: Official database images tell you which folder holds their data. Check the image's page on Docker Hub, then mount a named volume there. If you mount the wrong path, the database works fine and stores its data in the container, which is the trap from the start of this lesson.
A volume cannot be removed while a container uses it
docker run -d --name notes-keeper -v notes-data:/data alpine:3.24 sleep 300
docker volume rm notes-data
Error response from daemon: remove notes-data: volume is in use
Docker protects you here. Remove the container first, then the volume.
docker rm -f notes-keeper
docker volume rm notes-data
notes-keeper
notes-data
⚠ Warning: Removing a volume deletes its data, and there is no undo. docker compose down -v and docker volume prune do the same to every volume they cover. Read the name in the output before you press Enter.
A folder from your computer
The other kind of mount is a bind mount. It puts a folder from your computer into the container, so both sides see the same files. It is what you want when you are editing code and want the container to see each change at once.
New-Item -ItemType Directory -Force site | Out-Null
Set-Content -Path site\index.html -Value "<h1>Version one</h1>"
docker run -d --name site-demo -p 8083:80 -v "${PWD}\site:/usr/share/nginx/html:ro" nginx:1.30-alpine
curl.exe -s http://localhost:8083
<h1>Version one</h1>
${PWD}\site is the full path of the site folder, and :ro mounts it read-only inside the container, so a bug in the container cannot damage your files. Now edit the file on your computer and ask again, without restarting anything.
Set-Content -Path site\index.html -Value "<h1>Version two</h1>"
curl.exe -s http://localhost:8083
<h1>Version two</h1>
The change showed up at once, because the container is reading your file. Remove :ro and the container can write to that folder too. Careful: files it creates belong to root inside the container, and they appear in your folder.
On Linux and macOS, write the path as "$(pwd)/site:/usr/share/nginx/html:ro".
⚠ Warning: Only mount a folder you are willing to let the container read, and mount write access only when you must. A bind mount is a hole through the wall. The mount is -v host-path:container-path, and if the host path does not exist, Docker may create an empty folder there and the container sees nothing.
docker rm -f site-demo
Named volumes keep data safe from you. Bind mounts keep it close to you. Which one would you pick for a database, and which for a web page you are editing?
About
Show that a container's files vanish with it, then keep data in a named volume and a bind mount. After this, you can choose where a container's data lives and not lose it by accident.
Comments (0)
Sign in to commentNo comments yet.